Wednesday 30 May 2012

41 Factors - Linux and Windows : Who Better ?

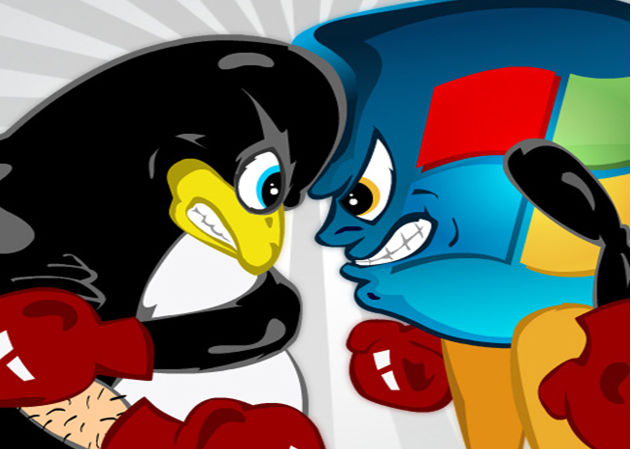
Many a times Windows users talk about what Windows can do but Linux can’t. To be fair, they also need to know what Linux can do but Windows can’t.


Microsoft Windows is a family of operating systems by Microsoft. They can run on several types of platforms such as servers, embedded devices and, most typically, on personal computers. Microsoft first introduced an operating environment named Windows in November 1985 as an add-on to MS-DOS in response to the growing trend of graphical user interfaces (GUI) popularized by the Macintosh. Microsoft Windows eventually came to dominate the world's personal computer market.

Linux is a free Open Source Operating System, based on UNIX. It is available from many vendors with optional paid for support and provides an increasingly viable alternative to the Win 32 platform. C++ and C# compilers are all available on the Linux platform.


Reasons why Linux is better than Windows

· Linux doesn’t have the virus problems : Even Microsoft’s CEO Steve Balmer couldn’t clean Windows Viruses. Still not convinced? Its not that there aren’t any viruses for Linux but Linux is more secure and less virus prone.

· No Spyware: Not just spyware but none of those funny applications that keep doing things in the background.

· Linux doesn’t need defragging: The Linux file systems work very efficiently such that it arranges data in a way that it doesn’t require defragging.

· Linux doesn’t crash without any apparent reasons. In Linux the core operating system (kernel) is separate from the GUl (X-Window) from the applications (OpenOffice.org, etc). So even if the application crashes, the core operating system is not affected. In Windows (Microsoft prefers to call this tight integration) if the Browser crashes, it can take down the entire operating system.

· Linux doesn’t crash if you accidentally pulled out your USB key/pen drive. Try this a 100 times if you don’t believe me. But don’t blame me if your pen drive data gets corrupt.

· Linux doesn’t require frequent re-installation:
In Windows if the OS crashes, there is no easy way to recover this. Many IT support staff doesn’t know what to do and all they can do is re-install Windows. Which means that users applications and preferences are lost, and needs to be installed again. I haven’t seen anyone using Linux, requiring re-installing unless there is a hard drive failure. Most things in Linux can be fixed without requiring re-installation.

· Linux doesn’t require frequent rebooting:
Linux runs extremely stable, even if an application crashes, there is no need to reboot the whole system, just restart that application or service. Linux also doesn’t require rebooting when a new hardware device is added configured. Linux doesn’t require rebooting when you change any setting or re-configure your Network or when you install a new application.

· No licensing headaches:
Yes Linux is free and you don’t know need to bother about the complexion licensing of per user/per PC/per server/etc. Note: Some Linux distributions charge a yearly subscription to get the updates and patches, however this is still simpler than the proprietary world.

· 100 File Systems: Linux can read over a 100 different types of file systems. Windows is limited to its own two file systems. Well most general users may not care about this but its extremely useful is you are working in a mixed environment or you need to extract some data from a hard drive formatted on another computer.

· Source Code:
You have access to the source code and the right to modify or fix things if you are a programmer. Many end users think this is not necessary but they will realize how important this is when their application vendor decides to discontinue support on an older version to promote a newer one.

· No Piracy:
You can also share the software with your friends and its completely legal to do so. Didn’t your teacher tell you in kindergarten that you should share things with your friends? Linux and Open Source actually encourage that while if you do that in Windows its not only considered illegal but they will call you a pirate!

· Linux costs less
, because not only the OS is free but the applications are also free. Plus since Linux doesn’t have a virus problem, you also save on the recurring cost of Anti-Virus software. Note: You may still have to pay for support/training but the overall running cost is low.

· Powerful Shell: Both Linux and Windows has shell environment Windows (know as command prompt). The shell environments in Linux (such as bash) are more powerful and you can write entire programs using the scripting language. This is extremely useful to automate repetitive tasks such as backup.

· Portability: Linux can run from a CD or can be installed on the hard drive. Windows by default doesn’t have any such option. Using live CDs such as Ubuntu/Knoppix, users can try out Linux by booting from the CD, without the need to install the operating system. Linux is extremely portable, it can also run off usb pen drives/portable hardrives/thumb drives and more.

· US government have Window Backdoors:
Did you know that in Windows, there is built in back-door entry so US government can see you data as and when they like? Yes the US NSA has the key build into every copy of Windows. In Linux there is no such thing possible as the operating system is open source and can easily be detected and disabled.

· Linux has built in virtualization (XEN/KVM/Virtual Box/etc.) so you can run multiple copies of Linux or Windows simultaneously.

· Complete Driver Packages:
The Linux kernel comes shipped with large number of hardware drivers. 3000 Printers, 1000 Digital Cameras and 200 webcams were supported by Ubuntu. On Windows, a lot of hardware doesn’t work until you install the driver, this problem is worse with Vista as Microsoft doesn’t allow drivers to be installed which are not supported/certified by Microsoft. On Linux, a huge percentage of today’s common hardware works perfectly out-of-the-box.

· No registry Keys:
Unlike Windows, Linux doesn’t use registry. Most of the configuration is stored in plain text files, which are easy to manage/backup and transfer between systems. Registry is a pain to manage, very complex and your system configuration is stored in a proprietary format which needs special tools to open. The biggest pain with registry is when it gets corrupted, this problem is eliminated in Linux because it doesn’t use registry.

· Linux is the most documented operating systems
and most of these documentations are available for free. These documents are well written and explain computing concepts too.

· No more hardware upgrades:
Linux runs happily on older hardware and the hardware requirements don’t increase with every new version. If you have really old computers like Pentium I/III, you can still convert them to thin clients using LTSP and still use them. If you compare the hardware requirements between Ubuntu and Windows, you would notice that Ubuntu’s hardware requirements haven’t changed for many versions.


· Completely localized:
As there is a strong community and the source code is available, Linux is localized into almost every language in the world. You can further customize it for your needs, you can easily do that.

· Excellent package management:
Linux has excellent package management tools which make it easy to install and upgrade applications, Most Linux distributions makes it very easy to upgrade from one version to another.

· Excellent Development platform:
If you are a developer, you will like Linux. Linux has all the development tools, libraries and compilers built in. If you are Java developer or a Web developer using PHP/Perl/Rub or doing C,C++ development, you will feel at home.

· No Hidden APIs:
Windows many hidden or undocumented APIs which is used for unfair advantage to Microsoft. In Linux all APIs are completely open and documented. For example Microsoft specifies that everyone writing Internet application should use the Winsock API while Microsoft Internet Explorer doesn’t use the Winsock API, it uses an undocumented API allowing Internet Explorer to run faster than other browsers.

· No Execute by default:
By default if you download any file, it doesn’t have the execute permission, making your system more secure. The app cannot execute unless you go and change the permissions.

· No write access to applications: By default users cannot install applications unless they change their permission or login as a supervisor. This ensures that any virus or malicious code cannot go and write to your application folder.

· No open ports:
By default most Linux distributions have all their incoming ports blocked, thereby making their Operating more secure from network attacks.

· Centralised repository of applications ensures that you are downloading your applications/patches only from a known source only. The repository is digitally signed which ensures that only the right application and code can be downloaded and installed on your computer.

· Faster release cycle:
Many Linux distributions have a fixed release cycle of 6 months which makes it easy for them to incorporate all the latest applications, bug fixes, improvement and support for newer hardware. Windows release cycle is not predictable. Takes a few years and is often delayed.

· Multiple Interfaces:
While both Linux and Windows have a GUI, Windows has only one default GUI. Linux is all about choice and has a option to use different type of GUIs or Window Managers as they are know as in Linux. Users can choose from something that looks like their favourite Operating System or they can choose something that’s simple and fast. Popular ones are Gnome and KDE.

· Free Applications:
Most Linux distributions come bundled with whole lot of applications such as Office Suite, Photo Editing, etc. You not only get the OS for free but you also don’t have to pay for the applications. Yes many of these open source applications such as OpenOffice.org also run on Windows but you need to find, download and install them where as there are available in most Linux distros by default.

· Linux saves bandwidth cost:
The volume of Updates that Windows, Antivirus and similar applications do, is much more as compared the updated in Linux. So if you are paying for every MB that you download, its a big consideration.

· No automatic updates: Windows Vista it setup to automatically update your system by default. In Linux it will alert you for an update but you have to choice to click and apply the update. You can setup to automatic update if you like. So you can update when you like and not when your operating system decides to update.

· Chat and Social Networking: Empathy/Kopete popular IM clients on Linux are single clients that can connect to all the protocols – Facbook Chat, Google Talk, Yahoo, MSN, Jabber, ICQ, AOL and more. Twitter/Facebook broadcast from the desktop. With Gwibber client, you can view your social network status right from your desktop or update your status to all your accounts without logging onto each of them separately.

· Superb Graphics: Linux already has a usable 3D Desktop – Compiz. This makes it easy to switch and view multiple desktops simultaneously. It also adds a nice eye candy to Linux. If you still believe Linux is only for geeks, this feature will definitely change your mind. This doesn’t require you to purchase expensive graphic cards, it very comfortably works with on board graphic card.

· No annoying message like Vista keeps telling you that xyz application is trying to access your system. Vista confuses the user, either the user will always click allow or don’t know what to do.

· Easy to dual boot: Linux makes it easy for it to exist with any other operating system. If you install Linux on a system which already has Windows, Linux will not mess your Windows. Windows on the other hand messes up your Linux partition, if it finds one.

· Linux has bundled Databases such as MySQL and PostgreSQL which are extremely powerful and used in production environments. Customer doesn’t need to purchase expensive databases.

· Linux is been used for super computing clusters, most of top super computers in the World use Linux. Windows just can’t scale to that level.

· File system scalability: while NTFS file system can scale up to 16TB, XFS on Linux can scale up to 18 million TB! Yes that bigger than what you would ever need.

· Processor scalability: Linux can scale to unlimited processors. It is already running on a single system with 2048 CPUs. Windows can’t even claim to come anywhere near that number.

Sunday 27 May 2012

prevent users from writing to usb

The following registry setting will prevent writing to usb in windows xp.
Expand HKEY_LOCAL_MACHINE\System\CurrentControlSet\Contro l Add a new key and name it "StorageDevicePolicies".
In the window on the right then create a new DWORD value and label it WriteProtect, give it a value of "1" and users can no longer write to USB drives.
Giving a value of "0" will allow to write again

NOTPAD SYMBOLS

Alt+15= ¤ Alt+79= O Alt+129= ü Alt+179= ¦ Alt+229= Õ Alt+20= ¶ Alt+80= P Alt+130= é Alt+180= ¦ Alt+230= µ Alt+21= § Alt+81= Q Alt+131= â Alt+181= Á Alt+231= þ Alt+32=espaço Alt+82= R Alt+132= ä Alt+182= Â Alt+232= Þ Alt+33= ! Alt+83= S Alt+133= à Alt+183= À Alt+233= Ú Alt+34=" Alt+84= T Alt+134= å Alt+184= © Alt+234= Û Alt+35= # Alt+85= U Alt+135= ç Alt+185= ¦ Alt+235= Ù Alt+36= $ Alt+86= V Alt+136= ê Alt+186= ¦ Alt+236= ý Alt+37= % Alt+87= W Alt+137= ë Alt+187= + Alt+237= Ý Alt+38= & Alt+88= X Alt+138= è Alt+188= + Alt+238= ¯ Alt+39= ' Alt+89= Y Alt+139= ï Alt+189= ¢ Alt+239= ´ Alt+40= ( Alt+90= Z Alt+140= î Alt+190= ¥ Alt+240= ­ Alt+41= ) Alt+91= [ Alt+141= ì Alt+191= + Alt+241= ± Alt+42= * Alt+92= Alt+142= Ä Alt+192= + Alt+242= _ Alt+43= + Alt+93= ] Alt+143= Å Alt+193= - Alt+243= ¾ Alt+44= , Alt+94= ^ Alt+144= É Alt+194= - Alt+244= ¶ Alt+45= - Alt+95= _ Alt+145= æ Alt+195= + Alt+245= § Alt+46= . Alt+96= ` Alt+146= Æ Alt+196= - Alt+246= ÷ Alt+47= / Alt+97= a Alt+147= ô Alt+197= + Alt+247= ¸ Alt+48= 0 Alt+98= b Alt+148= ö Alt+198= ã Alt+248= ° Alt+49= 1 Alt+99= c Alt+149= ò Alt+199= Ã Alt+249= ¨ Alt+50= 2 Alt+100= d Alt+150= û Alt+200= + Alt+250= · Alt+51= 3 Alt+101= e Alt+151= ù Alt+201= + Alt+251= ¹ Alt+52= 4 Alt+102= f Alt+152= ÿ Alt+202= - Alt+252= ³ Alt+53= 5 Alt+103= g Alt+153= Ö Alt+203= - Alt+253= ² Alt+54= 6 Alt+104= h Alt+154= Ü Alt+204= ¦ Alt+254= _ Alt+55= 7 Alt+105= i Alt+155= ø Alt+205= - Alt+56= 8 Alt+106= j Alt+156= £ Alt+206= + Alt+57= 9 Alt+107= k Alt+157= Ø Alt+207= ¤ Alt+58= : Alt+108= l Alt+158= × Alt+208= ð Alt+59= ; Alt+109= m Alt+159= ƒ Alt+209= Ð Alt+60= < 110=" n" 160=" á" 210=" +" 61=" =" 111=" o" 161=" í" 211=" Ë" 62=" "> Alt+112= p Alt+162= ó Alt+212= È Alt+63= ? Alt+113= q Alt+163= ú Alt+213= i Alt+64= @ Alt+114= r Alt+164= ñ Alt+214= Í Alt+65= A Alt+115= s Alt+165= Ñ Alt+215= Î Alt+66= B Alt+116= t Alt+166= ª Alt+216= Ï Alt+67= C Alt+117= u Alt+167= º
♀& #9792 widout spaces♂& #9794 widout spaces◘& #9688 widout spaces•& #8266 widout spaces♠& #9824 widout spaces♣& #9827 widout spaces Δ & #916 widout spacesΘ & #920 widout spacesΞ & #926 widout spacesΠ & #928 widout spacesΣ & #931 widout spacesΦ& #934 widout spacesΨ& #936 widout spacesΩ& #937 widout spacesα& #945 widout spacesβ& #946 widout spacesγ& #947 widout spacesδ& #948 widout spacesε& #949 widout spacesζ& #950 widout spacesη& #951 widout spacesθ& #952 widout spacesι& #953 widout spacesκ& #954 widout spacesλ& #955 widout spacesμ& #956 widout spacesξ& #958 widout spacesς
& #962 widout spacesσ & #963 widout spacesτ & #964 widout spacesψ
& #968 widout spacesω & #969 widout spacesθ & #977 widout spaces & #9829 ♥
alt+987=█ alt+6=♠

add any Application to right click of your computer

Caution::>>  As it is related to Windows regisrty it can be dangerous
so,Try This at ur own risk


To write your name on right click application
please follow the steps.
1.Copy/Paste the following code in Notepad And then Save it as .reg

Windows Registry Editor Version 5.00
[HKEY_CLASSES_ROOT\CLSID\{20D04FE0-3AEA-1069-A2D8-08002B30309D}\shell\Registry Editor]
@="Your Name Or Name of the Application"
[HKEY_CLASSES_ROOT\CLSID\{20D04FE0-3AEA-1069-A2D8-08002B30309D}\shell\Registry Editor\command]
@="Location Of The Application"

2.
Now edit it and then Type your name In

Eg:

[HKEY_CLASSES_ROOT\CLSID\{20D04FE0-3AEA-1069-A2D8-08002B30309D}\shell\Registry Editor]
@="Prem_verma"

3. If u want to get any application, once you click Your name or name of application
Then , Type the location Of the application Which u want to open In:

[HKEY_CLASSES_ROOT\CLSID\{20D04FE0-3AEA-1069-A2D8-08002B30309D}\shell\Registry Editor\command]
@="Location Of The Application"

For eg.C:\Program Files\Yahoo!\Messenger\messenger.exe
Thats It finally save it And then Run it .


------------------------------------------------------------
To add Application Control Panel

[HKEY_LOCAL_MACHINE\SOFTWARE\Classes\CLSID\{20D04FE0-3AEA-1069-A2D8-08002B30309D}\shell\Control Panel\command]
@="rundll32.exe shell32.dll,Control_RunDLL"

To add Application Add/Remove

[HKEY_CLASSES_ROOT\CLSID\{20D04FE0-3AEA-1069-A2D8-08002B30309D}\shell\Add/Remove\command]
@="control appwiz.cpl"

To add Application Reboot

[HKEY_CLASSES_ROOT\CLSID\{20D04FE0-3AEA-1069-A2D8-08002B30309D}\shell\[Reboot]\command]
@="shutdown -r -f -t 5"

To add Application Shutdown

[HKEY_CLASSES_ROOT\CLSID\{20D04FE0-3AEA-1069-A2D8-08002B30309D}\shell\[Shutdown]\command]
@="shutdown -s -f -t 5"

Saturday 26 May 2012

special symbols and smileys


Use the folowing code to write special symbols and smileys in scrap.
Press alt key and the following from Num pad (only)...


alt + 987 -

alt + 1 -

alt + 2 -

alt + 3 -

alt + 4 -

alt + 5 -

alt + 6 -

alt + 7 -

alt + 8 -

alt + 9 -


alt + 0178 - ²

alt + 0489 - é

alt + 0756 - ô

alt + 0742 - æ

alt + 0719 - Ï

alt + 0739 - ã

alt + 0729 - Ù

The same way many combinations can be tried..
And U can Also use these codes to RENAME Ur Folders in win XP..its coool. Try it !!!

funny notepad tricksssss

Notepad fun.........
~!~!~!~ Trick#1 ~!~!~!~
1. Open a blank Notepad file
2. Write .LOG as the first line of the file, followed by a enter. Save the file and close it.
3. Double-click the file to open it and notice that Notepad appends the current date and time to the end of the file and places the cursor on the line after.
4. Type your notes and then save and close the file.

After that open the file and see the changes.
by this trick u can also use ur notebook as a personal diary.


~!~!~!~ Trick#2 ~!~!~!~

1.open notepad
2. type "bush hid the facts"
3. save it and close it...
4 then open it again........n see the changes...............


~!~!~!~ Trick#3 ~!~!~!~
Do you know the number of the flight that was used to attack the world Trade Centre????
The flight number was Q33N.

Now, open your Notepad, type the number of the flight (i.e. Q33N).
Now click on format>font, increase the font size upto 72, and change the font style to 'wingdings'. Now see the ammmaaazzzing thing.

~!~!~!~ Trick#4 ~!~!~!~
Over at WinCustomize, someone thought they'd found an Easter Egg in the Windows Notepad application. If you:
1. Open Notepad
2. Type the text "this app can break" (without quotes)
3. Save the file
4. Re-open the file in Notepad

Notepad displays seemingly-random Chinese characters, or boxes if your default Notepad font doesn't support those characters.

It's not an Easter egg (even though it seems like a funny one), and as it turns out, Notepad writes the file correctly. It's only when Notepad reads the file back in that it seems to lose its mind.

Mozilla Firefox Shortcut Keys

Mozilla Firefox Shortcut Keys

The followings are short-cuts for Mozilla FirefoxSome keys are version specific
Use at your own risk.
Mouse shortcuts

Shortcut Description
Double-click (On a word) Select the word.
Triple-click Select entire line.
Wheel click Activate the Smooth scrolling
Hold Ctrl + Scroll Wheel forward Increase font size
Hold Ctrl + Scroll Wheel backward Decrease font size
Click one point then hold Shift & click another Create a selection from the two points


Keyboard shortcuts

Shortcut Description
F1 New Tab.
F5 Refresh.
F6 Move focus to address bar.
F11 Toggle on/off full-screen mode
Alt + (Left Arrow) Go back on history. Same pas Backspace
Alt + (Right Arrow) Go forward on history.
Ctrl + A Select All.
Ctrl + B Favorites.
Ctrl + C Copy Selected.
Ctrl + D Add the current page to favorite.
Ctrl + E Search panel.
Ctrl + F Find (on page).
Ctrl + H Toggle History panel.
Ctrl + I Toggle Favorites panel.
Ctrl + J Download.
Ctrl + N Open New browser window.
Ctrl + P Print current page / frame.
Ctrl + R Refresh. Same as F5
Ctrl + T New Tab
Esc Stop (while page is loading).
Ctrl + Enter Auto complete a url address. For example, type thecomputricks in the address bar and press CTRL + ENTER to get http://www.http://prem-verma.blogspot.in
Shift + Enter Complete a .net instead of a .com address.
Ctrl + Shift + Enter Complete a .org address.
Ctrl + Tab Cycle through open tabs.

Internet Connection Sharing on Windows XP

Internet Connection Sharing on Windows XP

This trick shows you how to share your internet connections on multiple computers within a workgroup with Windows XP. Windows XP has a built-in feature that called "Internet Connection Sharing" (ICS) that allows home users to share their internet connections on multiple computers.
If you are not familiar with the network configurations, the easiest way to share your internet connection is to purchase a router or hub. Use this trick only if you don't have a router, or don't want to use a router, or if you just want to try out the feature.
A simple way to understand this feature is, you are making your host computer (the computer directly connects to the internet) functioning as a router for other computers.

What do you need?

  • A "Host" computer that running Windows XP. This computer must have at least TWO (2) network adapters. One adapter - let's call it "Adapter #1" - connects to the internet and another, "Adapter #2", connects to a hub or directly to other computers.
  • Client computer(s), which run any version of Windows. A client computer can be connected to the host computer directly by a cross-over cable or indirectly through a hub.
  • This trick assumes that the host computer is connected to the internet and you are able to access the internet on this computer.

Configure the Host Computer

  1. Logon the host computer as Administrator.
  2. Click Start >> Control Panel.
  3. Click Network and Internet Connections.
  4. Click Network Connections.
  5. Right-click the connection that you use to connect to the internet (the connection with Adapter #1). This connection can be either a high-speed internet connection or a dial-up connection.
  6. Click Properties.
  7. Click Advanced tab.
  8. Under Internet Connection Sharing, select the Allow other network users to connect through this computer's Internet connection check box.
  9. If you are sharing a dial-up Internet connection, select the Establish a dial-up connection whenever a computer on my network attempts to access the Internet check box if you want to permit your computer to automatically connect to the Internet.
  10. Click OK. You'll reieve the following message:
    When Internet Connection Sharing is enabled, your LAN adapter will be set to use IP address 192.168.0.1. Your computer may lose connectivity with other computers on your network. If these other computers have static IP addresses, it is a good idea to set them to obtain their IP addresses automatically. Are you sure you want to enable Internet Connection Sharing?
  11. Click Yes.
Configure the Client Computer(s)
To use the shared connection from the Host computer, a client computer must be configured with "Automatic IP address". The main configurations are:
  1. Configure TCP/IP Automatic IP
  2. Configure Internet Connection
The steps for the above two configurations are vary on different versions of Windows.
The following procedures are for Windows XP client computers.
  1. Log on to the client computer as Administrator or as Owner.
  2. Click Start >> Control Panel.
  3. Click Network and Internet Connections.
  4. Click Network Connections.
  5. Right-click Local Area Connection, and then click Properties.
  6. Click the General tab, click Internet Protocol (TCP/IP) in the This connection uses the following items list, and then click Properties.
  7. In the Internet Protocol (TCP/IP) Properties dialog box, click Obtain an IP address automatically (if it is not already selected), and then click OK.


  8. Click Start >> Control Panel
  9. Click Network and Internet Connections.
  10. Click Internet Options.
  11. In the Internet Properties dialog box, click the Connections tab.
  12. Click the Setup button. The New Connection Wizard starts.
  13. On the Welcome to the New Connection Wizard page, click Next.
  14. Click Connect to the Internet, and then click Next.
  15. Click Set up my connection manually, and then click Next.
  16. Click Connect using a broadband connection that is always on, and then click Next.
  17. On the Completing the New Connection Wizard page, click Finish.
  18. Exit Control Panel and test the internet. You might need to restart the computer.

Reset Windows Password

Forgot your administrator password? Don't panic, it happens to some other people too, and you have found the solution! The following instructions will show you step-by-step how to reset your local Windows password. This only works for local user accounts, however, not domain accounts.The password recovery tool from this page is written by Petter Nordahl-Hagen, and the original information, as well as the downloadable tool, can be found from his website. According to the author, this tool should work for Windows NT/2000/XP/Vista.
WARNING! Users who have EFS encrypted files on the Windows XP or Vista computers will loose access to the EFS encrypted files after recovery of your password!

Use this trick at your own risks
The tool to reset your password can be downloaded here.

I. Download the bootdisk:
  1. Download the bootdisk, which includes the password recovery tool here. The file contains the ISO CD image.
  2. Unzip (extract) the ISO file and burn it to a CD. Note that this is an ISO file, you must burn it to CD as an ISO image, not as a "data" file. If you're not sure how, see this article. Also, the image is bootable, you need to burn the image to a CD using the image burning feature; do not extract the contents of the ISO and burn them to the CD, you'll end up with a CD that can't boot! 
II. Understanding the process:
  • You'll use the bootdisk created from the above steps to bootup your computer, which you want to reset your administrator password.
  • You'll be asked for things like: which drive is the boot drive, which path to the SAM file, etc.. but don't worry, details will be provided.
  • Once you have selected an account to reset the password, you'll need to type in a new password; however, it is highly recommended to use a BLANK password at this point, then you can change your password later in Windows.
  • Follow the prompts to the end. You'll need to save the changes at the end! 


III. OK! Enough talking. Here are the steps:
  1. Startup your computer with the bootdisk created above. You should see a welcome screen following with a prompt:
     boot:
  2. Just wait, the bootup process will continute automatically. Then you should see a screen similar to this:
     =========================================================
    . Step ONE: Select disk where the Windows installation is
    =========================================================
    ....
    NT partitions found:
    1 : /dev/sda1 4001MB Boot
    2 : /dev/sda5 2148MB

    Please select partition by number or
    a = show all partitions, d = automatically load new disk drivers
    m = manually load new disk drivers
    l = relist NTFS/FAT partitions, q = quit
    Select: [1]
  3. Notice the last line "Select: [1]" which shows the [1] as default selection because the tool detected the bootup partition is [1]. This might be different on your own machine, so you should review the list shown under "NT partitions found:". The partition with the word "Boot" should be selected.

  4. Hit Enter once you confirm the selection. You should see a similar screen as follows:
     =========================================================
    . Step TWO: Select PATH and registry files
    =========================================================
    ....
    What is the path to the registry directory? (relative to windows disk)
    [windows/system32/config] :
  5. Notice the last line "[windows/system32/config]" which shows the default path. This was also detected by the tool. If the path is correct, hit Enter, or if you wish to enter a different path, enter it now then hit Enter.
    Here are the paths for different versions of Windows:
    - Windows NT 3.51: winnt35/system32/config
    - Windows NT 4 and Windows 2000: winnt/system32/config
    - Windows XP/2003 (and often Windows 2000 upgraded from Windows 98 or earlier): windows/system32/config

  6. Once you hit "Enter", you should see the next screen similar to the following:
     -r--------    1 0        0          262144 Jan 12 18:01 SAM
    -r-------- 1 0 0 262144 Jan 12 18:01 SECURITY
    -r-------- 1 0 0 262144 Jan 12 18:01 default
    -r-------- 1 0 0 8912896 Jan 12 18:01 software
    -r-------- 1 0 0 2359296 Jan 12 18:01 system
    dr-x------ 1 0 0 4096 Sep 8 11:37 systemprofile
    -r-------- 1 0 0 262144 Sep 8 11:53 userdiff

    Select which part of registry to load, use predefined choices
    or list the files with space as delimiter
    1 - Password reset [sam system security]
    2 - RecoveryConsole parameters [software]
    q - quit - return to previous
    [1]
  7. Hit "Enter" with the default option selected "[1]". Then ...:
     =========================================================
    . Step THREE: Password or registry edit
    =========================================================
    Loaded hives:

    1 - Edit user data and passwords
    2 - Syskey status & change
    3 - RecoveryConsole settings
    - - -
    9 - Registry editor, now with full write support!
    q - Quit (you will be asked if there is something to save)

    What to do? [1] -> 1

  8. Hit "Enter" with the default option selected "[1]". Then ...:
     ===== chntpw Edit User Info & Passwords ====

    RID: 01f4, Username: <Administrator>
    RID: 01f5, Username: <Guest>, *disabled or locked*
    RID: 03e8, Username: <HelpAssistant>, *disabled or locked*
    RID: 03eb, Username: <pnh>, *disabled or locked*
    RID: 03ea, Username: <SUPPORT_388945a0>, *disabled or locked*

    Select: ! - quit, . - list users, 0x<RID> - User with RID (hex)
    or simply enter the username to change: [Administrator]

  9. Hit "Enter" with the default option selected "[Administrator]", or select another user account. Here you can enter the full user account surrounded by < and >, CASE-SENSITIVE, or enter the RID number (i.e. 0x1f4). Assuming you select the Administrator account, you should see the following screen:
     RID     : 0500 [01f4]
    Username: Administrator
    fullname:
    comment : Built-in account for administering the computer/domain
    homedir :

    Account bits: 0x0210 =
    [ ] Disabled | [ ] Homedir req. | [ ] Passwd not req. |
    [ ] Temp. duplicate | [X] Normal account | [ ] NMS account |
    [ ] Domain trust ac | [ ] Wks trust act. | [ ] Srv trust act |
    [X] Pwd don't expir | [ ] Auto lockout | [ ] (unknown 0x08) |
    [ ] (unknown 0x10) | [ ] (unknown 0x20) | [ ] (unknown 0x40) |

    Failed login count: 0, while max tries is: 0
    Total login count: 3

    * = blank the password (This may work better than setting a new password!)
    Enter nothing to leave it unchanged
    Please enter new password: *

  10. At the prompt "Please enter new password", Enter the * for a blank password (HIGHLY RECOMMENDED!) then press Enter
     Please enter new password: *
    Blanking password!

    Do you really wish to change it? (y/n) [n] y

  11. At the prompt, type in "y", then press Enter. Note that the default option is "n".
     Do you really wish to change it? (y/n) [n] y
    Changed!

    Select: ! - quit, . - list users, 0x - User with RID (hex)
    or simply enter the username to change: [Administrator] !

  12. Enter the "!" to go back to the main menu. Then select "q" at the following menu to quit:
     <>========<> chntpw Main Interactive Menu <>========<>

    Loaded hives:

    1 - Edit user data and passwords
    2 - Syskey status & change
    3 - RecoveryConsole settings
    - - -
    9 - Registry editor, now with full write support!
    q - Quit (you will be asked if there is something to save)

    What to do? [1] -> q

  13. A prompt to save changes displays, enter "y" to save:
     =========================================================
    . Step FOUR: Writing back changes
    =========================================================
    About to write file(s) back! Do it? [n] : y

  14. The changes are saved! You should see the following screen, press Enter, and reboot your computer.
     Writing  sam

    ***** EDIT COMPLETE *****

    You can try again if it somehow failed, or you selected wrong
    New run? [n] : n

Convert Any Document or Web Page to PDF

Somebody just told you that you need to have Adobe Acrobat (Writer) to create a PDF file? Guess what, you can get away from that pricey piece of software if you just need to convert some documents to pdf, without a need of fancy editing the pdf document.
Here's how. Thanks to the BullZip, who provides a Free Pdf printer. With this free tool, you can simply "print out" your document or webpage to a pdf file, just about the same way as you print it out to a printer.

You can visit BullZip.com for more information about the software.
Here the direct link to BullZip downloads page: Downloads
  1. To get started, first follow the link above and download Free Pdf Printer from BullZip, then install it to your computer.
  2. Once you're done, you might need to close the program (or the web browser) which you're currently viewing the document. This helps refreshing the list of available printers on your computer.
  3. Once you get back to the document you want to convert, perform the same steps are you print out the document, i.e. File > Print ...
  4. When you see the Print window pop-up, select "Bullzip PDF Printer" under "Printers", then click "OK".
  5. BullZip PDF Printer will then start to analyze your document and display a new pop-up window, where you can direct it to the location you want to save the pdf file.
  6. Follow the pop-up windows and.. hola! The PDF document is created!

Wednesday 23 May 2012

know abut your ip.

Dynamic IP vs Static IP

Static IP addressing is for one customer on one IP address and Dynamic IP addressing assigns a different IP address each time the ISP customer logs on to their computer, but this is dependent upon the Internet Service Provider (ISP) because some ISP's only change the IP address as they deem it necessary.
If you have Dynamic IP Addressing through your Website Host it means that you are sharing an IP Address with several other customers.
If you are a beginner on the internet, an avid internet user, are entertaining the thought of starting your own website business, are a gamer, use VOIP or VPN there are several things you should know about IP Addressing.

Static IP Addressing

If you feel the need to always know what your IP address is then you need a Static IP address, because it is constant. Static IP addresses are more reliable for Voice over Internet Protocol (VOIP), more reliable to host a gaming website or to play X-Box, Play Station, use Virtual Private Network for secure access to files from your company network computer, etc. Static IP addresses are also great if you use your computer as a server, as it should give your file server faster file uploads and downloads. Another plus with Static IP's, when hosting a website you are not sharing your IP with another company who sends out a lot of E-mail SPAM and not only has their website been shut down but in turn gets your IP address blacklisted.
In contrast a static IP address can become a security risk, because the address is always the same. Static IP's are easier to track for data mining companies. Static IP addressing is less cost effective than Dynamic IP Addressing.

Dynamic IP Addressing

The biggest advantages of Dynamic IP Addressing are less security risk as the computer is assigned a new IP address each time the customer logs on, they are cost effective and there is automatic network configuration (the less human intervention with network configuration the better). Dynamic addressing is usually used by ISP's so that one IP address can be assigned to several users, however some ISP's use Sticky Dynamic IP Addressing and do not change the IP address very often. Dynamic IP Addressing can be used by families with several computers or by a small business owner who has a home office. The software that comes with a router allows for Dynamic Host Configuration Protocol (DHCP) setup and assigns each computer attached to the router an IP address automatically.
In contrast, Dynamic IP addressing should not be used for VOIP, VPN, playing online games or game hosting because Dynamic IP addressing is less reliable then Static IP addressing and could cause the service to disconnect while you are on a VOIP, VPN or gaming.

Friday 18 May 2012

E book of windows 7 & shortcuts

Hiii friends today  I'm sharing win7 ebook of shortcut keys.  this is complete book or win7 shortcuts..

and every thing of win 7 .             download E book of win7.pdf


download  ebook of win7  from  download E book of win7.pdf

windows vista win7 keys


friends this is  some win7 and vista keys. its make your work faster then faster.. so just read it and enjoy ..


Windows system key combinations

F1: Help
CTRL+ESC: Open Start menu
ALT+TAB: Switch between open programs
ALT+F4: Quit program
SHIFT+DELETE: Delete item permanently

Windows program key combinations

CTRL+C: Copy
CTRL+X: Cut
CTRL+V: Paste
CTRL+Z: Undo
CTRL+B: Bold
CTRL+U: Underline
CTRL+I: Italic

Mouse click/keyboard modifier combinations for shell objects

SHIFT+right click: Displays a shortcut menu containing alternative commands
SHIFT+double click: Runs the alternate default command (the second item on the menu)
ALT+double click: Displays properties
SHIFT+DELETE: Deletes an item immediately without placing it in the Recycle Bin

General keyboard-only commands

F1: Starts Windows Help
F10: Activates menu bar options
SHIFT+F10 Opens a shortcut menu for the selected item (this is the same as right-clicking an object
CTRL+ESC: Opens the Start menu (use the ARROW keys to select an item)
CTRL+ESC or ESC: Selects the Start button (press TAB to select the taskbar, or press SHIFT+F10 for a context menu)
ALT+DOWN ARROW: Opens a drop-down list box
ALT+TAB: Switch to another running program (hold down the ALT key and then press the TAB key to view the task-switching window)
SHIFT: Press and hold down the SHIFT key while you insert a CD-ROM to bypass the automatic-run feature
ALT+SPACE: Displays the main window's System menu (from the System menu, you can restore, move, resize, minimize, maximize, or close the window)
ALT+- (ALT+hyphen) : Displays the Multiple Document Interface (MDI) child window's System menu (from the MDI child window's System menu, you can restore, move, resize, minimize, maximize, or close the child window)
CTRL+TAB: Switch to the next child window of a Multiple Document Interface (MDI) program
ALT+underlined letter in menu: Opens the menu
ALT+F4: Closes the current window
CTRL+F4: Closes the current Multiple Document Interface (MDI) window
ALT+F6: Switch between multiple windows in the same program (for example, when the Notepad Find dialog box is displayed, ALT+F6 switches between the Find dialog box and the main Notepad window)

Shell objects and general folder/Windows Explorer shortcuts

For a selected object:
F2: Rename object
F3: Find all files
CTRL+X: Cut
CTRL+C: Copy
CTRL+V: Paste
SHIFT+DELETE: Delete selection immediately, without moving the item to the Recycle Bin
ALT+ENTER: Open the properties for the selected object

To copy a file

Press and hold down the CTRL key while you drag the file to another folder.

To create a shortcut

Press and hold down CTRL+SHIFT while you drag a file to the desktop or a folder.

General folder/shortcut control

F4: Selects the Go To A Different Folder box and moves down the entries in the box (if the toolbar is active in Windows Explorer)
F5: Refreshes the current window.
F6: Moves among panes in Windows Explorer
CTRL+G: Opens the Go To Folder tool (in Windows 95 Windows Explorer only)
CTRL+Z: Undo the last command
CTRL+A: Select all the items in the current window
BACKSPACE: Switch to the parent folder
SHIFT+click+Close button: For folders, close the current folder plus all parent folders

Windows Explorer tree control

Numeric Keypad *: Expands everything under the current selection
Numeric Keypad +: Expands the current selection
Numeric Keypad -: Collapses the current selection.
RIGHT ARROW: Expands the current selection if it is not expanded, otherwise goes to the first child
LEFT ARROW: Collapses the current selection if it is expanded, otherwise goes to the parent

Properties control

CTRL+TAB/CTRL+ SHIFT+TAB: Move through the property tabs

Accessibility shortcuts

Press SHIFT five times: Toggles StickyKeys on and off
Press down and hold the right SHIFT key for eight seconds: Toggles FilterKeys on and off
Press down and hold the NUM LOCK key for five seconds: Toggles ToggleKeys on and off
Left ALT+left SHIFT+NUM LOCK: Toggles MouseKeys on and off
Left ALT+left SHIFT+PRINT SCREEN: Toggles high contrast on and off

Microsoft Natural Keyboard keys

Windows Logo: Start menu
Windows Logo+R: Run dialog box
Windows Logo+M: Minimize all
SHIFT+Windows Logo+M: Undo minimize all
Windows Logo+F1: Help
Windows Logo+E: Windows Explorer
Windows Logo+F: Find files or folders
Windows Logo+D: Minimizes all open windows and displays the desktop
CTRL+Windows Logo+F: Find computer
CTRL+Windows Logo+TAB: Moves focus from Start, to the Quick Launch toolbar, to the system tray (use RIGHT ARROW or LEFT ARROW to move focus to items on the Quick Launch toolbar and the system tray)
Windows Logo+TAB: Cycle through taskbar buttons
Windows Logo+Break: System Properties dialog box
Application key: Displays a shortcut menu for the selected item

Microsoft Natural Keyboard with IntelliType software installed

Windows Logo+L: Log off Windows
Windows Logo+P: Starts Print Manager
Windows Logo+C: Opens Control Panel
Windows Logo+V: Starts Clipboard
Windows Logo+K: Opens Keyboard Properties dialog box
Windows Logo+I: Opens Mouse Properties dialog box
Windows Logo+A: Starts Accessibility Options (if installed)
Windows Logo+SPACEBAR: Displays the list of Microsoft IntelliType shortcut keys
Windows Logo+S: Toggles CAPS LOCK on and off

Dialog box keyboard commands

TAB: Move to the next control in the dialog box
SHIFT+TAB: Move to the previous control in the dialog box
SPACEBAR: If the current control is a button, this clicks the button. If the current control is a check box, this toggles the check box. If the current control is an option, this selects the option.
ENTER: Equivalent to clicking the selected button (the button with the outline)
ESC: Equivalent to clicking the Cancel button
ALT+underlined letter in dialog box item: Move to the corresponding item

General Shortcuts


General Shortcuts

Hello friends today i'm sharing some usefull windows shortcut keys.  which is commonly use for do your task very quickly and  show your smartness.  with this short keys .

don't forget to give your feedback and please give suggestion for doing some thing new for you.. 


The General Shortcuts

We’ll kickoff the list with some really general shortcuts that you often used.
  • CTRL+C (Copy)
  • CTRL+X (Cut)
  • CTRL+V (Paste)
  • CTRL+Z (Undo)
  • Delete (Delete)
  • Shift+Delete (Delete the selected item permanently without placing the item in the Recycle Bin)
  • CTRL while dragging an item (Copy the selected item)
  • CTRL+Shift while dragging an item (Create a shortcut to the selected item)
  • F2 key (Rename the selected item)
  • CTRL+RIGHT ARROW (Move the insertion point to the beginning of the next word)
  • CTRL+LEFT ARROW (Move the insertion point to the beginning of the previous word)
  • CTRL+DOWN ARROW (Move the insertion point to the beginning of the next paragraph)
  • CTRL+UP ARROW (Move the insertion point to the beginning of the previous paragraph)
  • CTRL+Shift with any of the arrow keys (Highlight a block of text)
  • Shift with any of the arrow keys (Select more than one item in a window or on the desktop, or select text in a document)
  • CTRL+A (Select all)
  • F3 key (Search for a file or a folder)
  • Alt+Enter (View the properties for the selected item)
  • Alt+F4 (Close the active item, or quit the active program)
  • Alt+Enter (Display the properties of the selected object)
  • Alt+Spacebar (Open the shortcut menu for the active window)
  • CTRL+F4 (Close the active document in programs that enable you to have multiple documents open simultaneously)
  • Alt+Tab (Switch between the open items)
  • Alt+ESC (Cycle through items in the order that they had been opened)
  • F6 key (Cycle through the screen elements in a window or on the desktop)
  • F4 key (Display the Address bar list in My Computer or Windows Explorer)
  • Shift+F10 (Display the shortcut menu for the selected item)
  • Alt+Spacebar (Display the System menu for the active window)
  • CTRL+ESC (Display the Start menu)
  • Alt+Underlined letter in a menu name (Display the corresponding menu)
  • Underlined letter in a command name on an open menu (Perform the corresponding command)
  • F10 key (Activate the menu bar in the active program)
  • RIGHT ARROW (Open the next menu to the right, or open a submenu)
  • LEFT ARROW (Open the next menu to the left, or close a submenu)
  • F5 key (Update the active window)
  • Backspace (View the folder one level up in My Computer or Windows Explorer)
  • ESC (Cancel the current task)
  • Shift when you insert a CD-ROM into the CD-ROM drive (Prevent the CD-ROM from automatically playing)

Dialog Box Keyboard Shortcuts

  • CTRL+Tab (Move forward through the tabs)
  • CTRL+Shift+Tab (Move backward through the tabs)
  • Tab (Move forward through the options)
  • Shift+Tab (Move backward through the options)
  • Alt+Underlined letter (Perform the corresponding command or select the corresponding option)
  • Enter (Perform the command for the active option or button)
  • Spacebar (Select or clear the check box if the active option is a check box)
  • Arrow keys (Select a button if the active option is a group of option buttons)
  • F1 key (Display Help)
  • F4 key (Display the items in the active list)
  • Backspace (Open a folder one level up if a folder is selected in the Save As or Open dialog box)

Microsoft Natural Keyboard Shortcuts

  • Win (Display or hide the Start menu)
  • Win+BREAK (Display the System Properties dialog box)
  • Win+D (Display the desktop)
  • Win+M (Minimize all of the windows)
  • Win+Shift+M (Restore the minimized windows)
  • Win+E (Open My Computer)
  • Win+F (Search for a file or a folder)
  • CTRL+Win+F (Search for computers)
  • Win+F1 (Display Windows Help)
  • Win+ L (Lock the keyboard)
  • Win+R (Open the Run dialog box)
  • Win+U (Open Utility Manager)

Accessibility Keyboard Shortcuts

  • Right Shift for eight seconds (Switch FilterKeys either on or off)
  • Left Alt+left Shift+PRINT SCREEN (Switch High Contrast either on or off)
  • Left Alt+left Shift+NUM LOCK (Switch the MouseKeys either on or off)
  • Shift five times (Switch the StickyKeys either on or off)
  • NUM LOCK for five seconds (Switch the ToggleKeys either on or off)
  • Win +U (Open Utility Manager)

Windows Explorer Keyboard Shortcuts

  • END (Display the bottom of the active window)
  • HOME (Display the top of the active window)
  • NUM LOCK+* (Display all of the subfolders that are under the selected folder)
  • NUM LOCK++ (Display the contents of the selected folder)
  • NUM LOCK+- (Collapse the selected folder)
  • LEFT ARROW (Collapse the current selection if it is expanded, or select the parent folder)
  • RIGHT ARROW (Display the current selection if it is collapsed, or select the first subfolder)

Shortcut Keys for Character Map

  • After you double-click a character on the grid of characters, you can move through the grid by using the keyboard shortcuts:
  • RIGHT ARROW (Move to the right or to the beginning of the next line)
  • LEFT ARROW (Move to the left or to the end of the previous line)
  • UP ARROW (Move up one row)
  • DOWN ARROW (Move down one row)
  • PAGE UP (Move up one screen at a time)
  • PAGE DOWN (Move down one screen at a time)
  • HOME (Move to the beginning of the line)
  • END (Move to the end of the line)
  • CTRL+HOME (Move to the first character)
  • CTRL+END (Move to the last character)
  • Spacebar (Switch between Enlarged and Nor mal mode when a character is selected)

Microsoft Management Console (MMC) Main Window Keyboard Shortcuts

  • CTRL+O (Open a saved console)
  • CTRL+N (Open a new console)
  • CTRL+S (Save the open console)
  • CTRL+M (Add or remove a console item)
  • CTRL+W (Open a new window)
  • F5 key (Update the content of all console windows)
  • Alt+Spacebar (Display the MMC window menu)
  • Alt+F4 (Close the console)
  • Alt+A (Display the Action menu)
  • Alt+V (Display the View menu)
  • Alt+F (Display the File menu)
  • Alt+O (Display the Favorites menu)

MMC Console Window Keyboard Shortcuts

  • CTRL+P (Print the current page or active pane)
  • Alt+- (Display the window menu for the active console window)
  • Shift+F10 (Display the Action shortcut menu for the selected item)
  • F1 key (Open the Help topic, if any, for the selected item)
  • F5 key (Update the content of all console windows)
  • CTRL+F10 (Maximize the active console window)
  • CTRL+F5 (Restore the active console window)
  • Alt+Enter (Display the Properties dialog box, if any, for the selected item)
  • F2 key (Rename the selected item)
  • CTRL+F4 (Close the active console window. When a console has only one console window, this shortcut closes the console)

Remote Desktop Connection Navigation

  • CTRL+Alt+END (Open the m*cro$oft Windows NT Security dialog box)
  • Alt+PAGE UP (Switch between programs from left to right)
  • Alt+PAGE DOWN (Switch between programs from right to left)
  • Alt+INSERT (Cycle through the programs in most recently used order)
  • Alt+HOME (Display the Start menu)
  • CTRL+Alt+BREAK (Switch the client computer between a window and a full screen)
  • Alt+Delete (Display the Windows menu)
  • CTRL+Alt+- (Place a snapshot of the active window in the client on the Terminal server clipboard and provide the same functionality as pressing PRINT SCREEN on a local computer.)
  • CTRL+Alt++ (Place a snapshot of the entire client window area on the Terminal server clipboard and provide the same functionality as pressing Alt+PRINT SCREEN on a local computer.)

Internet Explorer navigation

  • CTRL+B (Open the Organize Favorites dialog box)
  • CTRL+E (Open the Search bar)
  • CTRL+F (Start the Find utility)
  • CTRL+H (Open the History bar)
  • CTRL+I (Open the Favorites bar)
  • CTRL+L (Open the Open dialog box)
  • CTRL+N (Start another instance of the browser with the same Web address)
  • CTRL+O (Open the Open dialog box, the same as CTRL+L)
  • CTRL+P (Open the Print dialog box)
  • CTRL+R (Update the current Web page)
  • CTRL+W (Close the current window)

Sunday 6 May 2012

How to make fool any keylogger

These days Agents spy on u everywhere, in college, at work, maybe a trojan virus on your home PC which keylogs your paswords and mails it to someone else. If u think u r being logged, try this:

Whenever u have to type a password, never type the complete password in one go, ie, if your password is WINDOWS, u should type NDOW, then move cursor to start of the password field using the mouse ONLY, then type WI, then move cursor to end using the mouse and type S. This way the logger will record your keystrokes as ndowwis instead of WINDOWS.

Hahahahaaaa, keylogger fooled.
Tricks by
Prem verma


Subscribe to our Newsletter

Contact our Support

Email us: youremail@gmail.com

Our Team Memebers